A while ago I bought a loom, after a lot of reading, and thinking and a small amount of playing with a table loom I decided that a floor loom was something I wanted to explore. I read around looms and found there there were five main types,
- Jack looms, large table loom technology in that it uses one lever one shaft moves technology.
- Counterbalance looms, shafts work in pairs, and balanced in pairs, if one shaft goes up then it's partner needs to go down which is nice and smooth but has limitations as to combinations of shafts the can be moved.
- Countermarch looms, where the shafts are hung in balance with weighted lamms, which are more challenging to set up but offer flexibility, these seemed to have sub variations like vertical and horizontal.
- Dobby looms - which I never really understood and seemed a step that experienced weavers made.
- Jacquard looms - which like dobby looms seemed beyond the beginner.

Beyond those categories there were differences like how many shafts, and how the looms was structured, it's frame, and how many shafts it had. For a newbie on the outside the choices were fascinating - and complicated by the fact I wasn't in the market for a brand new loom so had to select from those on the second hand market. And even more so - those for sale locally, floor looms are large and transporting one far would require an extended budget. I watched looms on TradeMe ( like eBay - but here) and made note of features and prices. Looms being sold generally had little support materials, and were used - sometimes disassembled, and just a pile of lumber with a promise it could be a working loom. Somewhere in amidst all that I found and settled on my Loman loom. It was in great condition, well loved by its weaving owner, and came with introductions via knitting friends, and turns out it even came with transport assistance.

Best of all it was affordable, a fraction of the price of a new loom - which just wasn't going to happen. Like the older spinning wheels I have, the loom was of its time. The heddles were hand tied string, that worked but didn't seem as precise as newer Texsolv heddles. Well, in the last week I committed to replacing the heddles, I ordered 800 new heddles, 200 for each shaft. I was told this was 'a large amount for a loom' in the kind of voice that said - are you sure you want so many. But I thought I might as well set it up for all eventualities. Turns out that it was a wee bit of effort to remove the old heddles and install new ones - not something I'd want to repeat too often. Not difficult just - fiddly.
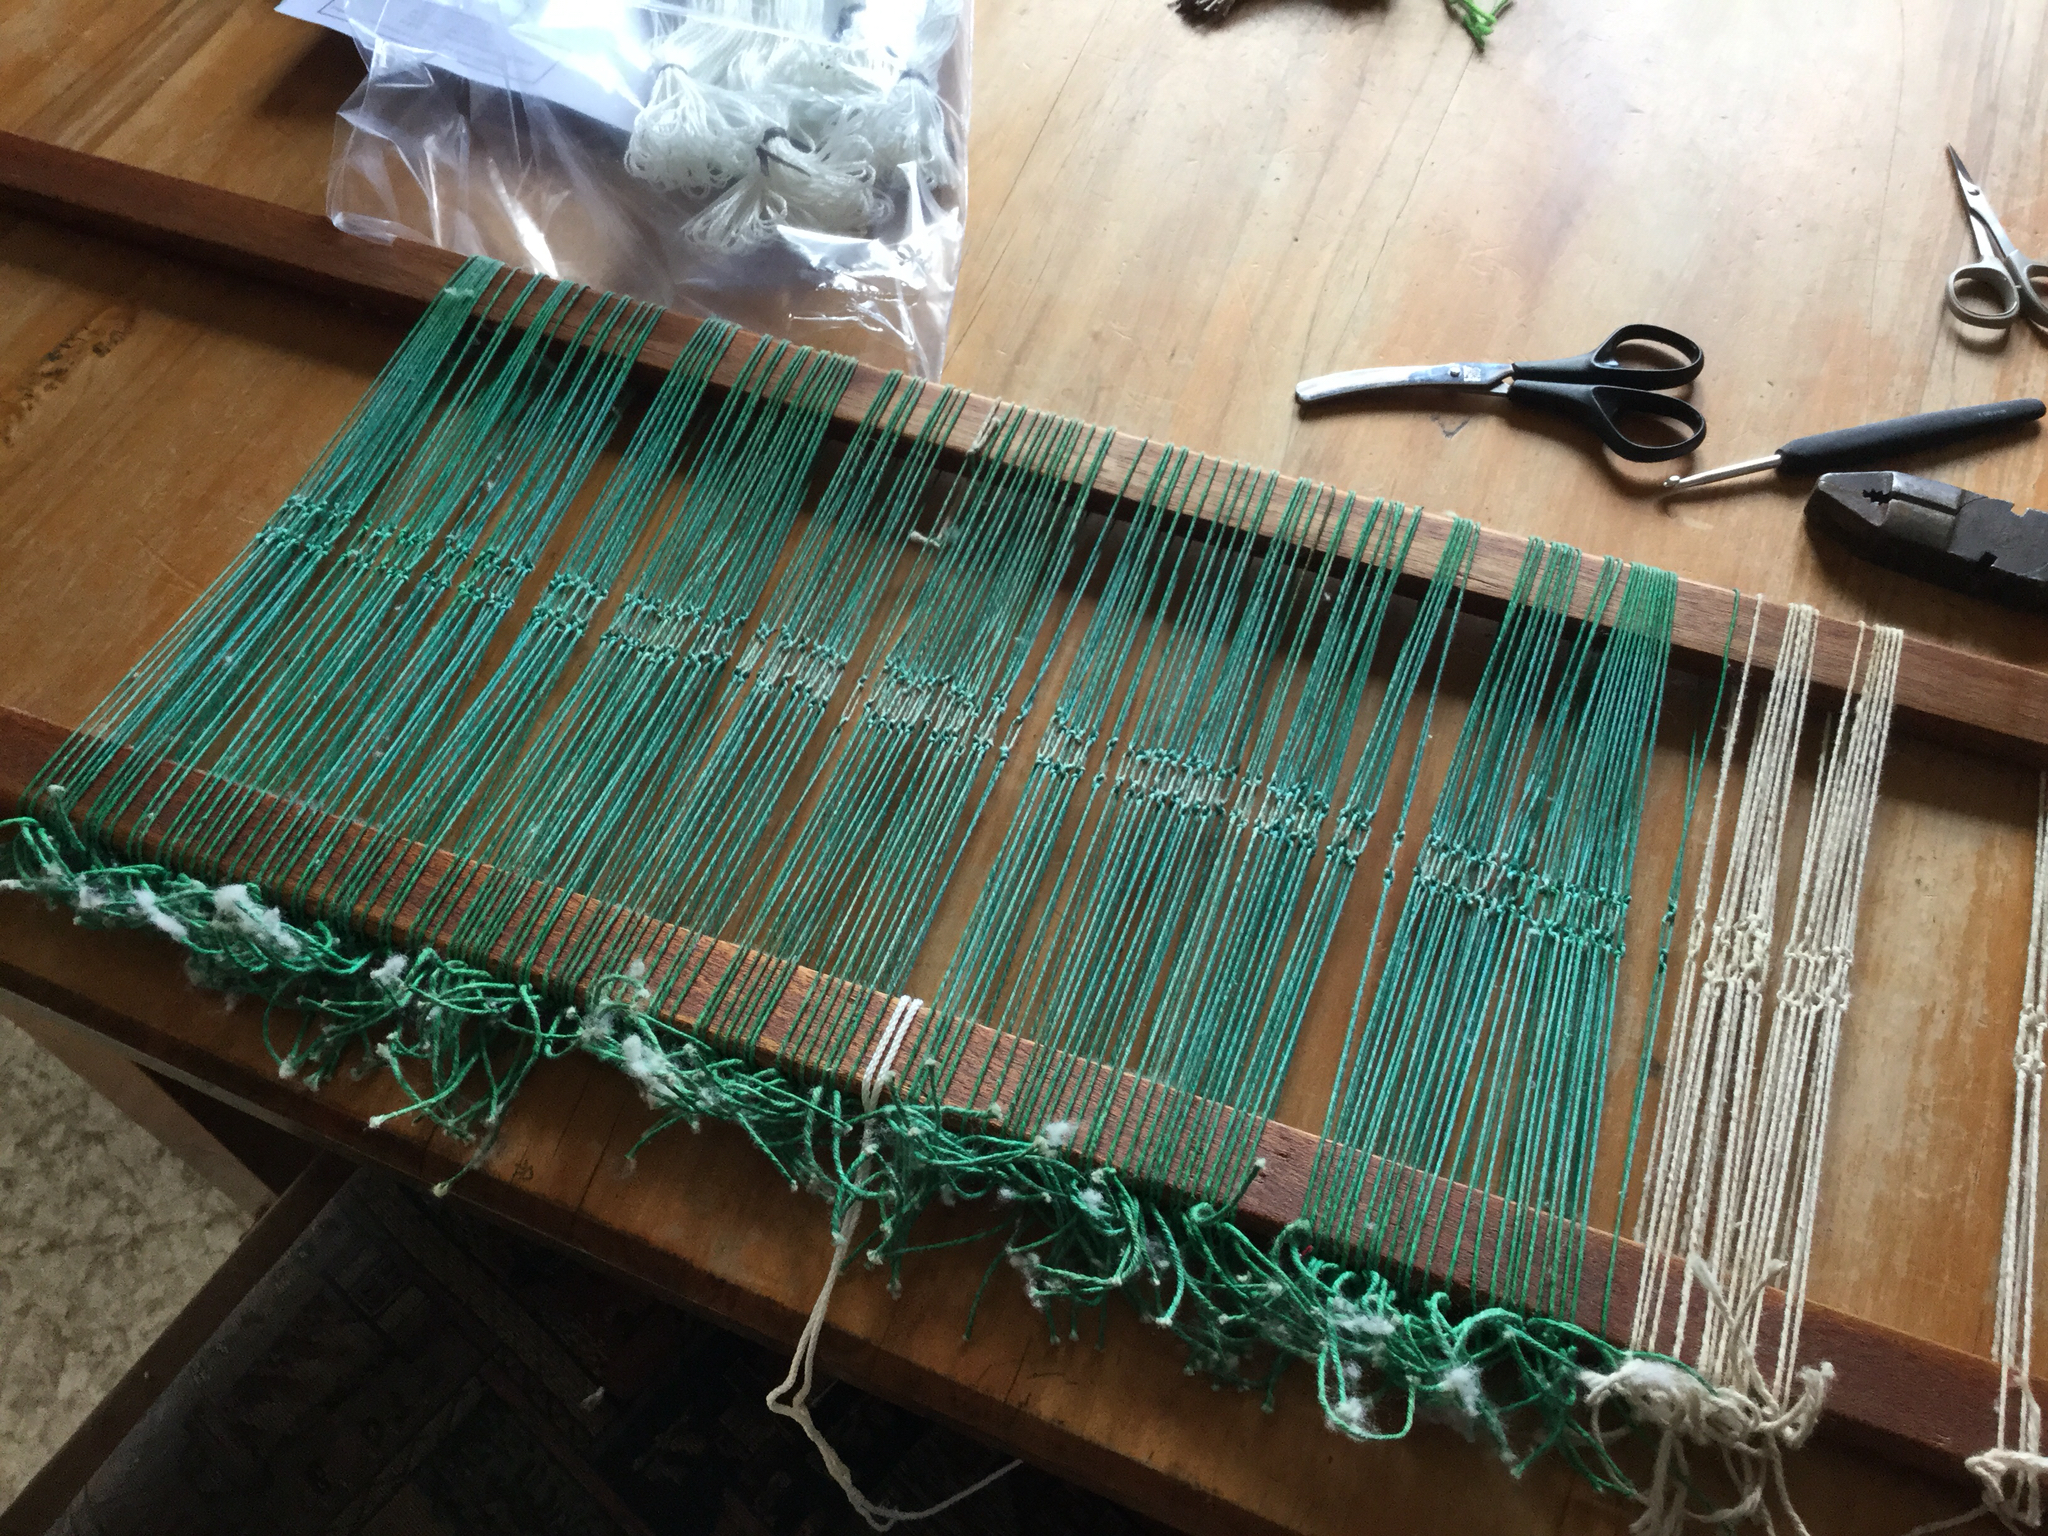
First I had to remove the shafts from the loom, and then remove the old heddles from the shafts. In the original configuration the shafts were held apart by metal rods - which were locked in place by age and some other force. It took Bear and I a wee bit of time with pliers and gentle persuasion to remove the rods at each end.
 I couldn't for the life of me work out how to put the spacing rods back once the new heddles were fitted on the shafts. There just wasn't enough spring in the wood or heddles to allow the top and bottom shaft to spread apart far enough for the rod to slide into place. So I decided to set these aside on the rational that many looms don't have metal spaces and rely on the heddles to support the lower bar of the shaft.
Then I put the shafts back on the loom, which was a two person job. Now the shafts are not stabilized by the end rods and the texsolv is slippery - the arrangement can slither off the shafts with a single mis- tilt.

Then it was and easy job to spread the heddles out and count out what I need either side of the center point. One question I had before this was did weavers cut the heddles or leave them joined - and reading around didn't answer the question. Some did and some didn't. I found having the heddles joined made it easier to separate each one and stop them riding over and under each other. The other benefit is that I can find the center point easily as each shaft has two set of one hundred, the gap between is the exact middle. Once I have the warp threaded, and then sleyed through the reed I still have to tie up the treddles and balance the loom. The next 'improvement' or investment is a new reed - the one with the loom is 8pdi - and I think a dinner one would suit what I want to weave more, and be stainless. I'm still deciding if I do that this warp or sometime in the future. Those two things in place and I will have double the 'cost' of the loom but essentially will have a brand new loom.
Knitting continues - first pair of fingerless rainbow mitts are finished and gifted, they were to small for me, second pair is on the needles, or rather on stitch holders waiting for needles.


This is the fiddly stage, but it's kind of fun and the second time around I understand the detailed instructions that say how to arrange each finger and where the tail of yarn needs to be. The tail is used to graft the joins between fingers closed - so it needs to be where the join is.

Take care - we have a another snow day here, na Stella.
1 comment:
I recently upgraded my heddles to texsolv as well, currently warping up her first post-heddle change project. It's going to be a real test of the new heddles as it's brushed mohair, eep! I also got a new reed, I now have 3 in total, an 8, a 10 (the new one) and a 13. The 8 & 13 are not stainless and I had to get the 13 cleaned of rust too.
Post a Comment