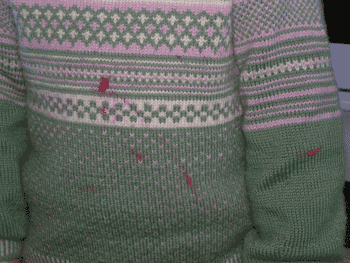


and whats on the needles, well ongoing with the Kangaroo jersey for my Toby, aged 7. I have been lazy with updating the blog, lazy or busy, not sure which. Just the blog has been lower down the priority list than finishing study, christmas baking, wrapping prezzies, tidying up ... getting on top of the washing.

Don't you just love that saying, who in their right mind would want to get on top of a pile of dirty washing?
Progress photos, Toby is here testing the kangaroo pocket, and it works, kind of boring knitting, but what the boy (and his dad want). But first the background work behind the kanga jersey. I completed the swatch a while ago, scanned it with a measure tape, washed and dry it and scanned it again with a measure tape for scale. I have done this with the last few swatches, and it provides a great record and counting teechnique for gauge. I print it out at between 100 & 200% and the stitches are easily countable, I can tick each stitch off and use the measure tape as a scale to find 10 cm or 2 inches or whatever.
Here is what came out of that. I measured a top that fit Toby, and used gauge to work out my stitch count for various parts of the jersey. I did a bit of math, just planning and working. Then I did a bit of sketching of what could be. I know that most 'designers' would sketch first, but I do lean towards the maker side of design. So before any thinking about how 'it' can be I have already quantified some limits, like the width of this jersey, the proportions, sleeve lengths, and such. so mine is a made jersey, no developmental leaps in this one. The next two pages in my work book show playing and planning how the shape and stripes can be, and the pocket. I really wanted to knit it in the round as much as possible, not to sew it in. It took me a lot of over thinking to work out a very simple solution was th best and most straightforward. Sometimes I can be brainy-stupid like that.
So my design, cast on half required stitches, plus 4, garter for a few rows, 2x2 rib for 12 rows, garter for a few more rows. this is the hem for the front, repeat to get the hem for the back. that gives me a narrow yet 'manly' gansey type hem. To join these two hems I overlaped the last 4 stitches of the front with the first 4 of the back, and knit one stitch from front together with one from the back. This technique reduces the pull of stress on that join stitch, repeat for the other vent. I put a stitch marker at the mid join mark.

Then I knit abut 4 cm straight in the round, to give the pocket some depth. I didn't want small toys nd collectable cards falling out. Starting the pocket flap, about 7 cm in from the side seam, in this case 30 stitches in, and kniting back and forth, stocking stitch. I wanted slanted openings, I drew vertical ones but like the look of the slant on the sketches. less boxy maybe? to achieve that slant on the knit rows I knit the first 2 stitches tog, and the last 2 tog, ssk'ing the last two to make them lean in the right way. I continued until this slanted edge looked wide enough to let a hand with a toy in easily. I strung these stiches on a yarn holder and broke the knitting yarn free.
To make the inside lower bag of the pocket, I picked up and knit stitches on the inside of the hem, the top of the garter edge. I picked up across the width of the pocket plus 3 extra each side, so the inside flap was 6 stitches wider overall. I knit back and forth until the inside flap was the same height as where i had started the pocket flap, and then joined this into the body stitches. I used the same technique of overlaping the extra 3 stitches behind the first and last 3 of the body stitches. Knitting two together.

I then knit the body until it meet up with the top of the flap, and this took ages. It repeadedly seemed like one more row would be enough and then, once done, still another row was required. I knit across the top of the pocket, knitting the pocket flap stitches into place with the body stitches. And above you have Toby demonstrating that there is a working pocket in the kangaroo jersey. I have now completed a few more rounds and have sewn the little open lower edge of the pocket lining into place. This last photo shows that little line of almost invisable seaming.
For us this holiday season brings travel, we are off to visit distant relatives this year, which involes a plane and lots of exitement from our two small people. But not any space to update or check blogs or mails so bog until the new year. My fav podcast cast-on is off air until Brenda is better, so i am sending get well wishes her way.
stella

